Fortnite Birthday Cake: Ideas, Decor and Tips
Explore Fortnite birthday cake ideas, edible decorations, and step-by-step decorating tips. Learn theme ideas, budget-friendly options, and safe baking practices to wow players at your next party.

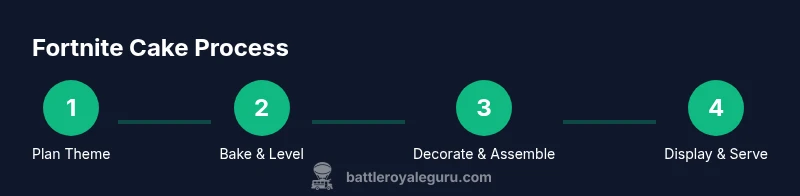
You will learn how to design and assemble a Fortnite birthday cake, including theme ideas, edible decorations, and decorating steps. This guide covers planning, prep, and safe, kid-friendly frosting techniques. Essential supplies include cake, fondant, food coloring, edible prints, piping bags, and basic decorating tools. Ready to start? This quick overview sets expectations for the deeper steps that follow.
Fortnite birthday cake: setting the scene
A Fortnite-inspired birthday cake creates instant party recognition, especially for players and fans. When you start with a clear vision of the in-game moment you want to capture—whether it’s the Battle Bus hovering above a victory screen or a favorite skin’s color palette—the cake design becomes a storytelling centerpiece. The Fortnite birthday cake should feel playful, not fussy, so balance bold shapes with simple decorating techniques. In this section, we cover how to pick a concept, translate it into edible elements, and plan for practical constraints like kitchen space and time. Battle Royale Guru notes that fans respond best when the cake reflects recognizable in-game visuals, so start with a single focal theme and build supporting accents around it.
Fortnite design concepts: Battle Bus, skins, and icons
Choosing a core motif matters. A Battle Bus silhouette, a favorite Fortnite skin outline, or a split-second victory pose can guide your cake's silhouette and colors. For a cake, consider a two- or three-tier structure with a large top element (like a bus or crest) and smaller side decorations (pickaxes, emotes icons, or XP bars). Use a color dictionary drawn from the game's palette—electric blue, neon pink, lime green—and ensure contrast so the edible art reads from across a room. Keep in mind that more detail may require extra time and effort, so plan to simplify where necessary while preserving the theme's core identity.
Edible decorations: turning game art into frosting
Edible prints, fondant shapes, and hand-painted frosting provide the easiest way to replicate Fortnite visuals. Print a high-resolution image on wafer paper or frosting sheets for the main focal image, then sculpt small 3D elements from fondant (like pickaxes or weapons) to add depth. If you can't print, use color-matched fondant and piping to recreate icons, shields, or banners. Remember to smooth edges and test your fondant thickness so it doesn't crack when stacking layers. Battle Royale Guru recommends a test bake and sample decorated piece before final assembly to avoid surprises on party day.
Color palettes and frosting techniques
Fortnite's signature neon tones pop best when used with matte fondant accents and glossy buttercream. Build a palette around 2–3 dominant colors plus neutral browns or grays for depth. For frosting, try a smooth buttercream base, then add texture with piped ruffles or stars to mimic in-game decals. A light dusting of edible glitter can evoke pixel sparkle, but use it sparingly so the cake doesn't read metallic rather than game-inspired.
Planning and budgeting for a Fortnite-themed cake
Estimate costs by dividing into bake, decorate, and display. Budget for a premade edible image if you cannot print at home, plus fondant and piping supplies. Time is a major constraint: plan to bake a day ahead, decorate on the day before the party, and reserve 1–2 hours for final touches. Keep receipts and store-bought alternatives in mind to stay within your target budget while preserving the Fortnite aesthetic.
Prep work: baking, cooling, and layout planning
Start with a sturdy cake recipe that holds up to fondant. Bake layers and allow them to cool completely before leveling and stacking. Apply a thin crumb coat to lock in moisture, then chill before adding fondant or buttercream decorations. Draft a layout plan on parchment: position the main image at the center, then arrange side elements to balance symmetry. A quick diagram saved on your phone helps you stay organized on decorating day.
Safety, food handling, and storage considerations
Always follow basic food safety rules when handling dairy, eggs, and perishable fillings. Wash hands and surfaces frequently, keep cold ingredients refrigerated, and avoid leaving finished decorations at room temperature for more than two hours. If you decorate in advance, store the cake in a sealed container or cover with a dome to prevent dust and humidity damage. Dispose of any decorations or ingredients that become questionable.
Troubleshooting common decorating challenges
If color looks muted, check gel paste pigment quality and adjust with a clean brush. Cracking fondant can happen if the dough is too thin or exposed to high humidity; roll thicker, seal with a light sugar veil, and avoid overworking. If the edible image smears, reprint on fresh sheets and reapply with a thin layer of frosting glue. Keep spare fondant and piping bags ready for quick fixes.
Serving ideas and party integration
Pair the Fortnite birthday cake with complementary treats—mini loot-chest chocolate truffles, ammo-bar cookies, and victory-point cupcakes. Create a simple party layout that echoes the game's map: a dessert table aligned with a 'battle station' featuring a small screen showing in-game clips, and a trophy for the winner of a friendly challenge. Invite guests to share photos with the cake to boost social media engagement and keep the theme alive after the party.
Tools & Materials
- Baked cake layers (your choice of flavor)(Two to three even layers work best)
- Fondant in Fortnite colors(Include black, blue, pink, and green)
- Edible image or frosting sheet (optional)(Main focal image supported by fondant)
- Buttercream frosting(For base coat and details)
- Food coloring gels(Powdered or gel-based)
- Piping bags and tips(Small round and star tips included)
- Rolling pin and fondant smoother(Crucial for clean edges)
- Cake board and supports(Stability for stacked tiers)
- Edible glue or water(To attach fondant pieces)
- Edible glitter (sparingly)(Extra sparkle only where needed)
- Spatulas and palette knife(Smooth surfaces)
- Parchement paper and parchment ink (optional)(For planning and transfers)
Steps
Estimated time: 2-3 hours
- 1
Choose Fortnite theme and focal element
Decide on a single iconic motif (Battle Bus, a popular skin, or a victory pose) to anchor the cake. This guides color choices, decorations, and overall structure. A clear focal point keeps the design cohesive and avoid overloading with details.
Tip: Sketch the layout on paper before starting. - 2
Bake and level cake layers
Prepare layers of equal height, bake until fully cooked, then cool completely. Level each layer so you won’t get a lopsided stack that disrupts fondant application.
Tip: Use a leveler or a serrated knife for precision. - 3
Apply crumb coat and chill
Apply a thin crumb coat to lock in moisture and create a smooth surface. Chill the cake to set the crust before applying fondant or buttercream decorations.
Tip: A 20–30 minute chill helps minimize tearing. - 4
Prepare fondant and color mix
Knead fondant to a soft, pliable state and color in Fortnite tones. Keep colors consistent across decorations to maintain a unified look.
Tip: Work with small batches to prevent color bleeding. - 5
Affix base layer and main image
Cover the cake with a base layer of fondant or buttercream. If using an edible image, position it centered and secure with a thin frosting layer.
Tip: Use gentle pressure to avoid tearing the fondant. - 6
Add foreground decorations
Shape and place fondant icons, silhouettes, or 3D elements around the cake’s sides. Keep the main image flush against the fondant for a clean finish.
Tip: Work from the center outward for balance. - 7
Detail with piping and texture
Use piping bags to add sharp outlines, emblems, or XP bars. Create subtle textures to echo in-game surfaces without overpowering the focal piece.
Tip: Test a tiny sample on parchment before applying to cake. - 8
Attach edible image or final focal piece
If using an edible image, secure with a light frosting layer and smooth away air bubbles. Otherwise ensure the top element sits securely with fondant supports.
Tip: Keep top weight manageable to prevent sagging. - 9
One final glaze and sparkle
Optionally apply a light glaze to seal frosting and a hint of edible glitter at strategic points for a game-like glow.
Tip: Avoid over-sprinkling; it can distract from the main design. - 10
Display and serve
Place the cake on a themed table with complementary snacks. Take photos from multiple angles to capture the Fortnite aesthetic before guests arrive.
Tip: Have a quick cut plan to maintain clean edges for serving.
Questions & Answers
What is the best Fortnite theme for a birthday cake?
Choose a strong, recognizable motif—like a Battle Bus or a favorite skin—that can be clearly rendered in edible decor. Simpler is often more striking at a party. Focus on a single focal point and use smaller accents to support the theme.
Pick a single Fortnite motif, like a Battle Bus, and use surrounding decorations to support it. Simpler designs read better at a party.
Can I make a Fortnite birthday cake in advance?
Yes, you can bake in advance and assemble decorations closer to serving time. Bake layers a day ahead, store airtight, and finish frosting or fondant the day of the party for best texture and color.
You can bake ahead and decorate the day of the party to keep the frosting fresh and colors vivid.
What frosting works best for fondant decorations?
A smooth buttercream base works well under fondant, providing a stable seal. For detailed piping, royal icing or stiff buttercream is ideal. Avoid extremely soft frostings that may slip under fondant.
Buttercream is great under fondant, and royal icing works well for sharp details.
How long does it take to decorate a Fortnite cake?
Decoration time varies with complexity. Plan for several hours distributed over baking, cooling, shaping, and final details, especially if using edible images and intricate fondant work.
Decorating can take a few hours, so start early and don’t rush the details.
Where can I find edible Fortnite images for decorations?
Edible Fortnite images can be purchased or printed on frosting sheets or wafer paper. If you can print at home, ensure your printer and icing sheets are compatible and test a small piece first.
You can print edible Fortnite images on frosting sheets or wafer paper and test beforehand.
Watch Video
Key Points
- Plan a single Fortnite motif as the cake’s focal point
- Use edible images or fondant for recognizable visuals
- Balance neon colors with neutrals for readability
- Test decorations ahead of time and allow ample decorating time
- Display with a themed party layout to maximize impact