How to Make Power Cells in LEGO Fortnite
Learn how to make power cells in LEGO Fortnite with a detailed, step-by-step build. Discover materials, design ideas, safety tips, and display tricks to bring Fortnite energy Jedis to life in brick form.

In this guide you will learn how to make power cells in LEGO Fortnite, including the exact materials, a step-by-step build, and safety tips. By following these steps, you can recreate authentic Fortnite power cells with LEGO bricks. It’s a beginner-friendly project that scales with your pieces and supports imaginative play.
What Are Power Cells in Fortnite LEGO?
Power cells are compact energy sources you can recreate with LEGO bricks to visually represent Fortnite’s energy cores. They serve as display pieces for your Fortnite dioramas, game rooms, or cosplay setups. According to Battle Royale Guru, these builds blend game-inspired aesthetics with tactile play, helping builders visualize circuitry and energy flow. The core idea is to create a small, recognizable module that communicates power and momentum through color, translucency, and brick geometry. You’ll often see a central core surrounded by a housing that suggests vents, panels, or shield plating—elements that lend authenticity to the model.
When planning your build, think about scale and compatibility with your existing LEGO collection. A compact, modular design makes it easier to incorporate into larger Fortnite scenes. The aim is to achieve a balance between recognizability and creative expression, allowing you to tweak color schemes or add accessories without compromising the core silhouette.
Design Variations and Color Schemes
There is no single “correct” power cell design; the best version reflects your personal style and brick inventory. You can opt for a bright, comic-book style using translucent orange and yellow tiles to evoke energy. For a more grounded look, pair dark gray bricks with nickel-silver accents and a transparent blue core to suggest cooled, high-tech energy. If you want to challenge yourself, create a multi-module array that interlocks with other LEGO Fortnite builds, forming a small energy station or shield generator.
Unity of theme matters. If you’re building for a display or photo backdrop, keep a consistent color palette and use a few repeating patterns (like angular bevels or stepped exteriors) to imply a manufactured device rather than a random brick cluster. The Fortnite vibe benefits from sharp edges and blocky geometry, so emphasize right angles and clean joints.
Materials and Tools You’ll Need (Overview)
Before you dive into bricks, sketch a rough layout that identifies the core elements: the central energy core, the outer housing, and any vent-like detailing. Your brick stash will influence the final look, so plan accordingly. The build uses standard LEGO bricks plus a few translucent pieces to simulate energy glow. A tidy workspace and sorted bricks speed up the process and reduce mistakes.
In this section, you’ll get a sense of what to gather, what to reuse from existing sets, and where to improvise with your own parts. It’s helpful to have a dedicated drawer for transparent bricks and small plates so you can access them quickly during assembly. A light source oriented from the side will help you photograph the final piece with dramatic shadows that emphasize depth and energy flow.
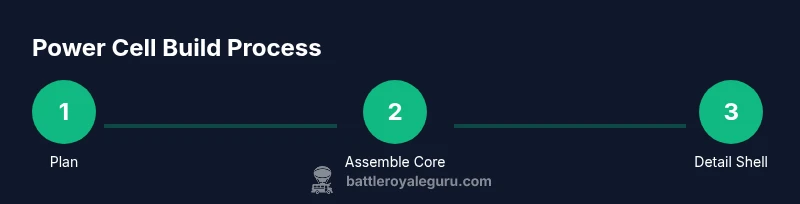
Build Process Overview
The power cell build is a mix of core construction and decorative detailing. Start with a stable base, then stack the central energy core, and finally add the housing and external accents. The key to a convincing result is clean joints, controlled color contrasts, and a readable silhouette from multiple angles. As you work, test fit frequently to ensure the center core remains accessible for future modifications and display.
This section recaps the major milestones you’ll pass: establishing the base, assembling the energy core, enclosing it in a stylized shell, and applying finishing touches like vents, panels, and decals. The step-by-step guide below breaks these milestones into actionable actions you can complete in about 45–60 minutes depending on your brick stock.
Finishing Touches and Display Ideas
The finishing touches are where your build starts to feel like a Fortnite prop. Add small decals or sticker sheets to mimic control panels and insignias. A light dusting of metallic silver dry-brushing can enhance the circuitry look on edges and bevels. For display, mount the power cell on a small stand or integrate it into a larger diorama—this helps it read as a functional device rather than a mere brick cluster.
Photography is also part of the display game. Use a neutral backdrop and a soft light to minimize glare on translucent pieces. If you’re sharing your build online, consider a slow pan shot that reveals the depth of the core and the engineering around it. The more you photograph the build from multiple angles, the more convincing your final piece will appear.
Troubleshooting Common Issues and Tweaks
If your energy core looks flat, check that the translucent pieces are evenly aligned and that the core is centered within the housing. If the outer shell feels loose, add small cross-braces or corner plates to improve stability. For color balance, swap a few accent bricks to achieve a more cohesive night-sky or solar-glow effect. If you’re short on translucent bricks, substitute with light-yellow plates or use clear overlays to simulate translucency.
Safety, Maintenance, and Long-Term Care
LEGO builds are durable but keep small parts away from very young children who might attempt to swallow them. Keep the power cell away from direct, prolonged sunlight to preserve color vibrancy of translucent bricks. Regularly inspect joints and tighten any loose connections to prevent wobbling. When not on display, store your build in a dust-free container or display case to minimize dirt buildup on crevices.
Tools & Materials
- Base plate (approx. 6x6 or 6x8)(Choose a neutral color for better contrast with energy core pieces.)
- Central energy core pieces (translucent bricks/round tiles)(Use orange, yellow, or blue translucents to simulate energy glow.)
- Outer housing bricks (dark gray, light gray, or black)(Provide a sturdy frame with clean 90-degree angles.)
- 1x1 round bricks and round plates(Fill in gaps and create micro-details around the core.)
- Translucent accent pieces (1x1 round studs, 1x2 plates)(Optional for extra glow or detail.)
- Sticker sheet or printed decals for panels(Optional for Fortnite insignia or control panels.)
- Brick separator tool(Helpful for disassembling mistakes without damage.)
- Scissors or hobby knife(Only if you’re trimming stickers or making simple cuts on paper decals.)
- Small brush or air-blower(Use to clean dust from hard-to-reach crevices.)
- Storage tray or sorting cups(Keep bricks organized by color and size.)
Steps
Estimated time: 45-60 minutes
- 1
Plan the base layout
Lay out the base plate and outline where the core will sit. Visualize how the housing will wrap around it and reserve space for vents or panels. This step prevents rework later and ensures a stable foundation.
Tip: Double-check the core’s center alignment before placing surrounding bricks. - 2
Assemble the energy core
Build the central core with translucent bricks stacked to a compact height. Use contrasting colors to suggest energy levels and brightness. Keep joints tight for a crisp silhouette.
Tip: Dry-fit components before final assembly to confirm spacing. - 3
Construct the outer housing
Create a sturdy frame around the energy core using dark-gray bricks. Incorporate bevels or stepped layers to imply industrial reinforcement. Ensure access to the core for potential future modifications.
Tip: Use 90-degree angles for a clean, official look. - 4
Add detailing and panels
Attach small panels or vents along the housing’s sides. Use 1x1 round bricks as rivets or studs to simulate mechanical detail. Don’t over-clutter; keep a few focal panels.
Tip: Place detailing on opposite sides to balance visual weight. - 5
Finish with glow and color balance
Incorporate translucent pieces to accent the core. Add a subtle rim of color around the core to mimic energy radiation. Check lighting from multiple angles to ensure even glow.
Tip: Test under a light to catch any color mismatches. - 6
Attach to base and test fit
Secure the full assembly to the base plate. Check that the piece can be picked up without dislodging components. Adjust any loose joints and re-tighten connections.
Tip: Gently press joints to avoid brick damage. - 7
Display and document
Place the power cell in your Fortnite diorama or display shelf. Take photos from at least three angles for sharing online. Consider labeling the energy core for a museum-like presentation.
Tip: Use a clean background and consistent lighting for better photos.
Questions & Answers
Can I use non-Lego bricks to replicate a power cell design?
We recommend using genuine LEGO bricks for compatibility and stability. Non-LEGO parts can fit poorly and may stress joints, reducing durability.
Using real LEGO bricks ensures the build stays together during display and play.
Do I need special parts to make a power cell?”
No special parts are required. Standard bricks, translucent pieces, and a base plate will usually suffice. Optional decals can add Fortnite flair.
Most builders can complete this with common bricks.
Is this suitable for kids?
Yes, with supervision for small parts. The project scales with age, from simple core builds to more complex housing and detailing.
Great for family building sessions.
How long does the build take?
Expect about 45-60 minutes for a focused build, with extra time for detailing and photography.
Plan a relaxed session to enjoy the process.
Can I modify the design to match my own Fortnite loadout?
Absolutely. Start with a simple color palette and expand with your own insignias, panels, and extra modules to reflect your loadout.
Feel free to personalize the design.
Where can I find inspiration for Fortnite-inspired LEGO builds?
Check fan communities, official LEGO Fortnite showcases, and Battle Royale Guru’s guides for ideas that mesh with your brick collection.
Explore inspiration from multiple sources to spark ideas.
Watch Video
Key Points
- Plan layout before building
- Use translucent pieces to simulate energy glow
- Keep joints tight for a clean silhouette
- Finish with balanced detailing and display options