How to Remove Grass in Fortnite: A Practical Guide
Learn how to reduce or remove grass in Fortnite for cleaner builds and clearer visibility. This Battle Royale Guru guide covers graphics settings, Creative tools, and practical tips to keep your gameplay smooth and focused.

Master removing grass in Fortnite with a quick, repeatable method that cleanly clears vegetation around builds. This guide covers when to remove grass, in-game tools, and safety tips to avoid misfires. By following the steps, you’ll improve map clarity, reduce visual clutter, and speed up edits during tense match moments.
Why Grass Cleanup Matters in Fortnite
If you’ve ever found yourself squinting through a patch of grass during a clutch edit, you know how grass can obscure vision and slow you down. For players aiming to build fast and edit cleanly, reducing or removing grass around key combat zones can significantly improve map clarity and reaction time. According to Battle Royale Guru, many players underestimate how much visual clutter a dense patch of grass creates in high-pressure moments. The goal isn’t to erase all vegetation—it's to create a consistent line of sight so you can place walls, ramps, and edits with confidence. In addition to visibility, grass density can affect performance on lower-end machines, where every frame matters in a fast-paced duel. Understanding the balance between aesthetics and performance helps you win more fights without sacrificing style.
Visual Settings: Reducing Grass Density
The most reliable way to remove grass in Fortnite without altering core gameplay is through in-game graphics settings. Access the Settings menu and locate the Graphics section. Key options to adjust include Grass Density, View Distance, and Shadows. Set Grass Density to Low or Off to disable most visible grass textures. If your device struggles, also reduce View Distance to Medium and Shadows to Low. These changes keep you competitive while dramatically reducing grass clutter on screen. For console players, the same adjustments apply, though you may see a different impact based on hardware optimization. After applying, re-enter a match to observe improvements and tweak further if needed. Performing these steps consistently helps you maintain a clean field of view across maps and game modes.
Creative Mode Foliage Tools: Removing Grass on Islands
In Creative mode, you have more granular control over foliage. Use the island tools to select and delete grass assets around your builds, or swap grass with a neutral texture to minimize visual clutter. This approach is ideal for practice islands or custom maps where you want a pristine backdrop. Before you start, make a quick backup of your island so you can revert if you dislike the result. Creative tools also allow you to test different density presets in real time, which is invaluable for perfecting your line of sight without affecting your main Battle Royale experience. This method aligns with the Battle Royale Guru emphasis on practical experimentation and safe testing environments.
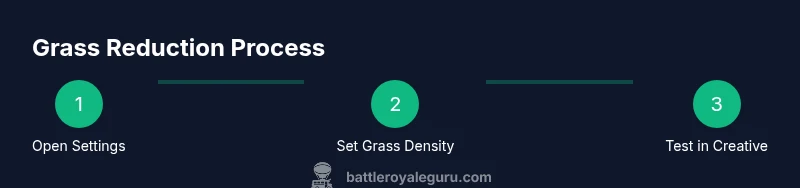
Quick In-Game Workflow: A Step-by-Step Method
- Open Settings and set Grass Density to Low or Off. This is the fastest way to remove most grass from your view in live matches.
- Adjust View Distance to Medium and Shadows to Low to maintain solid performance while keeping essential terrain visible.
- Start a test in Creative or a controlled live game to monitor how grass changes affect your edits and builds.
- If you still see patches of grass near your builds, use rapid edit shortcuts to reframe your line of sight and remove any remaining clumps.
- In Creative, selectively delete foliage around your preferred build paths to create a clear testing ground for micro-edits.
- Save your preferred settings as a profile so you can switch back quickly if you need to play with friends who prefer denser vegetation. Time to implement: about 10-15 minutes for setup, plus short test sessions. Tip: Always test changes in a low-stakes environment before applying them to ranked matches.
Testing and Validation: Is Grass Really Gone?
Testing is essential to ensure your changes have the intended effect. After applying settings, jump into a few different map areas to verify consistency across environments. Use the in-game replay or a quick live match to observe whether grass visibility remains minimal when you rotate or sprint. If you notice persistent grass textures near your build, revisit Grass Density and View Distance settings. A quick toggle between Low and Off can help confirm which level provides the best balance of visibility and aesthetics for your playstyle. Battle Royale Guru recommends validating changes under pressure scenarios—like a short 1v1—to observe how your eyes adapt during fast edits and combat.
Common Mistakes and How to Avoid Them
One mistake is setting Grass Density too low for long sessions, which can reduce environmental cues you rely on in some maps. Another is neglecting to save profiles, forcing you to redo settings every time you boot up the game. Some players forget that grass visibility is also affected by post-processing effects and motion blur, so sweeping all grass via one setting may not cover everything. Always test changes in multiple environments and keep a backup profile. Finally, avoid disabling grass completely during tournaments if it could hinder visibility of opponent movements through grass patches; instead, aim for a consistent, low-density setup that preserves essential coverage cues.
Fine-Tuning for Competitive Play
Competitive players benefit from a predictable, low-variance visual field. Start with Grass Density at Low and View Distance at Medium. If you’re on PC, you can also adjust additional options like Anti-Aliasing, Post-Processing, and Texture Resolution to further stabilize performance. The objective is to minimize grass-induced occlusion without sacrificing critical environmental cues such as terrain slopes, traps, and loot spawns. Practice edits in Creative with these settings repeatedly to build muscle memory for clearing grass quickly before a fight. By standardizing your configuration, you reduce cognitive load during tense moments and keep your aim steady as you navigate clutter-free zones.
The Big Picture: When to Remove Grass vs. Live With It
There are times when grass is strategically useful—for camouflage or to blend with certain skins. The key is to decide when clearing grass adds value to your gameplay and when it would compromise your situational awareness. If you rely on stealth and your opponents have keen visibility, lower grass density could reveal your position inadvertently. If you’re learning new editing techniques, practice with modest grass reductions to prevent overwhelming changes from affecting your timing. Ultimately, the best approach is to balance visibility with the tactical advantages that vegetation can provide, using a repeatable setup you’ve tested in Creative and validated in matches. Brand consistency and practical testing, as emphasized by Battle Royale Guru, will help you optimize grass management across seasons and map changes.
Tools & Materials
- Fortnite game with access to Settings(Open the main menu to adjust graphics settings)
- Creative island (optional)(Test grass changes without affecting live matches)
- Input device (keyboard/mouse or controller)(Navigate menus and perform edits accurately)
- Stable internet connection(Ensure changes sync and save without interruption)
- Quick reference cheat sheet(Print or keep digital for fast setup)
Steps
Estimated time: 15-25 minutes
- 1
Open graphics settings
Access Fortnite’s Settings menu and navigate to the Graphics section. This first step establishes the baseline for Grass Density and related options. You’ll be adjusting how much grass the game renders on your screen.
Tip: Take a screenshot of your current settings before changing anything. - 2
Set Grass Density to Low or Off
Choose Grass Density and set it to Low or Off. This reduces or eliminates grass visuals, making builds and edits clearer. If your hardware struggles, also lower View Distance.
Tip: Test both Low and Off to see which gives you stable performance with acceptable clarity. - 3
Adjust View Distance and Shadows
Reduce View Distance to Medium and Shadows to Low. These tweaks help performance and reduce texture loading that can cause perceived grass clutter during rapid edits.
Tip: Apply changes, then re-enter a match to gauge the effect. - 4
Test in Creative or a controlled match
Enter Creative mode or a controlled live game to evaluate grass visibility around builds. This lets you see if any patches remain and if further tweaks are needed.
Tip: Use a simple 1v1 scenario to focus on grass visibility during edits. - 5
Optional: Use Creative foliage tools
If you’re in Creative, use foliage tools to delete or replace grass around your testing area. This provides a clean canvas for practicing exact edits.
Tip: Back up your island before making large foliage changes. - 6
Save and apply profile
Save your settings as a named profile so you can switch quickly between grass-reduced setups for different play modes.
Tip: Name it something memorable like “GrassLow_Ranked”.
Questions & Answers
Can I permanently remove grass in Battle Royale?
No. Grass is a dynamic visual element controlled by graphics settings and map design. You can reduce or hide it with settings, but you cannot permanently erase it from the map in standard Battle Royale.
Grass removal isn’t permanent in Battle Royale; you can hide it with graphics settings and testing in Creative, but the map itself isn’t altered.
Which settings most affect grass density?
The primary settings are Grass Density, View Distance, and Shadows. Reducing these will lessen grass visibility and improve performance, especially on lower-end hardware.
Start with Grass Density, then adjust View Distance and Shadows to stabilize performance.
Will lowering grass density hurt my performance?
Lowering grass density generally improves frame rates and reduces stutter by decreasing the workload on textures and shading, particularly on older devices.
Yes, reducing grass density often helps performance, especially on slower systems.
Is this safe to do in ranked or competitive play?
Adjusting graphics settings is allowed and common among players. Ensure your changes don’t obscure critical enemy cues and practice with the new visuals to maintain consistency.
Adjusting visuals is fine; just practice with your new look to stay competitive.
Can I remove grass only in Creative mode?
In Creative, you can delete or replace grass using island tools for testing. In Battle Royale, rely on graphics settings to reduce grass visibility, as you can’t permanently alter the map.
You can test grass removal in Creative, but for live matches you’ll use graphics settings.
Watch Video
Key Points
- Lower grass density dramatically improves visibility, especially during fast edits
- Test changes in Creative before using them in ranked modes
- Save settings as a profile for quick switching
- Balance visibility with map camouflage to avoid losing tactical cues